This post may contain affiliate links. Please read our disclosure policy.

Couple of weeks ago when the temperature dropped from 88 to 46 over night (what the?!) an order was placed for Apple Pie. More like demanded. I demanded that my hands get to makin’ some pie crusts because pie season is back! So is wearing an oversized sweatshirt, preferably my husband’s, socks, and tall coffee mugs filled with hot chocolate and whipped cream. Bring it on cold season, I am ready! …Not really…
All this cold season stuff sounds a whole lot better in my head. Reality is that it is 40 degrees this morning and when I went to throw out some garbage earlier, I sorta froze. I couldn’t wait to get back inside.
But, then again, summer also sounds better in my head; bikinis, beaches, frozen margaritas… In reality, it’s more like, where’s my t-shirt so I can cover up the love handles and stretch marks… The last time I laid out at the beach was 5 years ago before I had kids, and I haven’t had a frozen margarita since the day I decided to nurse my little ladies… man, it feels like an eternity since I last had a frozen drink. Um, yeah, lets just stick with the romantic thoughts of the seasons rather than talking about what it’s like in reality.
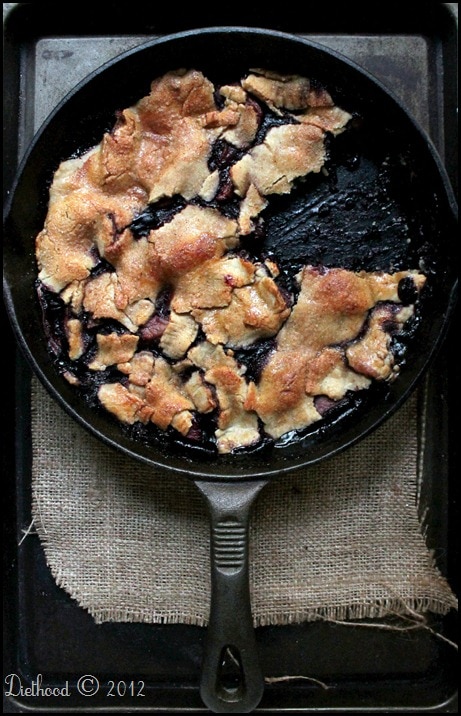
So, about this Skillet Apple Berry Pie… It almost didn’t make it to the blog. It was thrown into a folder with all my other “maybes”. Every food blogger has one of those files, I am sure of it. It wasn’t sitting in there because it lacked taste. In fact, it’s ridiculously delicious! I love this pie. Just give me a spoon and don’t watch me while I eat up the entire thing. It sat in the “maybes” folder because in the past two weeks I have made it two times, and the first time I made it, someone took a slice of the pie while it was cooling. (see photo above) That someone has yet to come forward. You’re thinking what’s the big deal. The big deal is that we have rules in this house. Rule #1 – don’t eat until after I have taken a photo of said food. Period.
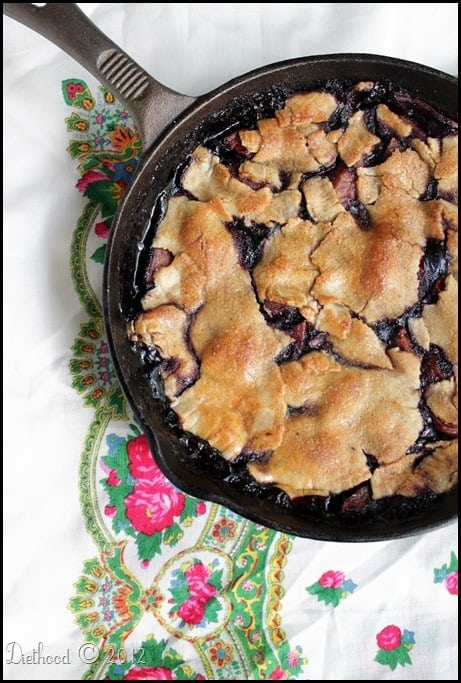
The second time I made it, and I made it mainly because I needed to take a photo of it, I could not find one of the props that I used in the first photo. That is, I could not find the black, worn-out cookie sheet that you see in the background. So now we have two different pies in two very different photos, and I still didn’t get the photo that I wanted. ~shrug~
At least the pie is freakin’ amazing and if you don’t have to share it, don’t. Just go at it. I promise you won’t notice the weight gain with that oversized sweatshirt that you have on. 🙂
Just a quick note about the pie; you may have noticed the filling peaking through the crust. That is because I cut it up intentionally so that it would look better in the photo. You can just roll out the crust without cutting it or breaking it up, and cover the entire filling with it. Also, I used golden delicious apples so to balance out the tartness from the berries. I have tried it with granny smiths and it just didn’t work for me in as far as taste.
ENJOY!
I’m linking up with Tidy Mom – I’m Lovin’ It Party
Pin this now to find it later
Pin It
Skillet Apple Berry Pie
Ingredients
For the Pie Crust
- Food Processor
- 2 1/2 cups flour
- pinch of salt
- 2 sticks of butter, , cold
- 1/4 cup cold water
For the Filling
- 2 tablespoons cornstarch
- 1/2 tablespoon cinnamon
- 1/2 tablespoon nutmeg
- 1/4 cups sugar
- 1/4 teaspoon salt
- 5 medium-sized golden delicious apples, , peeled, cored and cut into 1/4-inch thick wedges
- 2 tablespoons butter, , softened
- 1 package, (12 oz) frozen mixed berries, thawed
- 1 rolled pie crust
- 1 egg, , beaten
- 1/2 teaspoon cinnamon
- 1/2 teaspoon sugar
Instructions
Make the pie crust (makes two crusts - you can also use store-bought crust)
- In the bowl of a food processor, pulse together flour and salt.
- Add butter and mix until it resembles a coarse meal.
- With the machine running, slowly add water and process until a dough comes together.
- Add more water if dough seems too dry.
- Divide the dough into two equal size balls and flatten into disks.
- Wrap each disk in plastic wrap and chill at least 1 hour before rolling out.
- On a floured surface, roll out only one of the pie crusts; refrigerate the other pie dough for another use, or freeze it.
Make the Filling
- Preheat oven to 400.
- In a large bowl, whisk together the cornstarch, cinnamon, nutmeg, sugar, and salt.
- Add the apples and toss to coat. Set aside.
- Melt the butter in a large iron skillet over medium heat.
- Mix in the berries and let cook down for 4 minutes.
- Stir in the apples and continue to cook for 2 more minutes.
- Remove from heat and let cool for a minute or two.
- Roll out the pie crust and lay over the fruit filling, tucking the sides in.
- Brush the top of crust with egg wash.
- Combine the cinnamon and sugar in a small bowl and sprinkle the top of crust with cinnamon sugar.
- Place the iron skillet in the oven and bake for 25 to 30 minutes, or until crust is golden brown and fruit is bubbling.
Nutrition
Nutritional info is an estimate and provided as courtesy. Values may vary according to the ingredients and tools used. Please use your preferred nutritional calculator for more detailed info.


Sampling before photos is a no, no. Sometimes though it is so hard, even for me. This pie looks delicious! I am glad you made a re do.
My first reaction was “I WANT” it looks that amazing! I love the idea of making a pie in your cast iron pan. I finally made a pineapple upside-down cake, and grilled it in my cast iron….YUM! I wanted to let you know that I have a Pinterest board called “blogs I love.” http://pinterest.com/cafeterrablog/blogs-i-love/ I added you to the board, I really love your site, and you are the kindest soul! Sending hugs, Terra
Oh, Kate!! No margaritas in years??? What’s a girls to do?? Actually, you are better off skipping those calories. But, it appears you are substituting them with this Skillet Pie. Frankly, I think you are getting the better end of the deal!!! FABULOUS!
And another beautiful photograph, as usual.
Love anything about this skillet apple berry pie. Only thing I am very tentative about making a pie in a skillet, am sure I will wreck it! 🙂
This is exactly why I have to make the food in the afternoon and take the picture before the husband comes home. Once he sticks his fork into it, it’s gone. 🙂 This does look delicious. I’m sure making two was not much of a problem. I bet the second disappeared as fast as the first one.
I love a good skillet pie! I’ve never combined apples with berries. Great idea! I actually like how you cracked the top crust up a bit too. It makes it look rustic. 🙂 And I’m with you – all for living in the fantasies of the season vs. the realities.
It’s autumn, and it’s APPLE time! The pie looks scrumptious!
I have the no-eating-before-photo-shoot rule, too, but gosh, you had nothing to worry about. I love how the top image turned out. I’ve also re-shot dishes only to find myself having to use different props.
The way you cut up the dough was also a brilliant idea–looks so much more rustic. Would love to dig in to this one!
agreed. I think the top image is lovely. The piece missing actually adds…it doesn’t take away at all. It proves it is delicious as it looks!
Wow, that is just gorgous!
Love that you did this in a skillet!! Now that’s some rustic baking. I need to definitely give this one a try. 🙂